
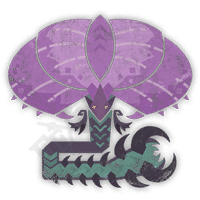
Hirabami
Large Monster
Leviathans that inhabit the Iceshard Cliffs. They have sharp, pincer like tails and peculiar membranes on their necks that catch the wind and keep them aloft. Hirabami can sometimes be sighted nesting in groups along the cliffs, using their scales or foreclaws to cling to walls or celiings while they sleep.
Guide and Information
Leviathans that inhabit the Iceshard Cliffs. They have sharp, pincer like tails and peculiar membranes on their necks that catch the wind and keep them aloft. Hirabami can sometimes be sighted nesting in groups along the cliffs, using their scales or foreclaws to cling to walls or celiings while they sleep.
Drops
Hirabami Tail Claw +
Rarity: 4
Drop Rate: Target: 10% Capture: 100%(Tail)100%(Tail) Break: 15%
Hirabami Scale +
Rarity: 3
Drop Rate: Target: 22% Break: 33% Carve: 45%
Hirabami Hide +
Rarity: 3
Drop Rate: Target: 22% Break: 27% Carve: 43%
Hirabami Webbing +
Rarity: 3
Drop Rate: Target: 15% Capture: 100%(Head) Break: 20% Carve: 12%
Freezer Sac
Rarity: 2
Drop Rate: Target: 20%
Hirabami Certificate S
Rarity: 1
Drop Rate: Target: 8%
Wyvern Gem
Rarity: 1
Drop Rate: Target: 3% Break: 5%
Hirabami Tail Claw
Rarity: 4
Drop Rate: Target: 10% Capture: 100%(Tail)100%(Tail) Break: 15%
Hirabami Scale
Rarity: 3
Drop Rate: Target: 22% Break: 35% Carve: 45%
Hirabami Hide
Rarity: 3
Drop Rate: Target: 22% Break: 30% Carve: 43%
Hirabami Webbing
Rarity: 3
Drop Rate: Target: 15% Capture: 100%(Head) Break: 20% Carve: 12%
Frost Sac
Rarity: 2
Drop Rate: Target: 23%
Hirabami Certificate
Rarity: 1
Drop Rate: Target: 8%
Attacks
720-Coil Spin Attack -
While on the ground, the Hirabami will coil its body, and wrap it around a target while spinning quickly. This attack leaves skid marks on the ground.
Aerial Body Slam
- While airborne, the Hirabami will slam its body going to the left, and then right as it moves toward a hunter.
Aerial Dive
- While hovering, the Hirabami will twist its body to fly higher, and then, it will dive toward a hunter as it twists its entire body. Hunters hit at the end of this dive can get thrown off-balance.
Aerial Dive Combo
- While hovering, the Hirabami will twist its head, followed by its body as it lunges forward, then up into the air. As it rises up, it will coil its body and will keep spinning for a few seconds. After gaining momentum, it will crash its body on the ground, and will continue spinning on the ground.
Aerial Ice Cannon
- While hovering, the Hirabami will pull back its neck membranes and head. After pausing briefly, it will shoot out Ice Cannons directed at hunters. It will shoot at the hunter first, then to the left, and to the right. There is a pause between firing the first and second shots, while the 3rd one follows up quickly.
Aerial Flip
- While Airborne, the Hirabami will do a tumble-like move where it dives head first, as its body follows in a circular motion. After this, it will land on the ground to wrap its body around a target.
Aerial Flip, Spin, and Dive
- This is a combo attack where the Hirabami starts by hovering, then flips around, to spin in a 720-degree, rise higher, and while its mouth is open, it will dive towards a target. The Hirabami gets stuck with its teeth on the ground for a few seconds.
Backflip to Tail Slam
- While on the ground, the Hirabami will raise its head as its arm pushes its body backward. Using the momentum, it will do a backflip, and once its arm touches the ground, it will keep the tail in a vertical position. After pausing briefly, it will slam its tail on the ground.
Coil to Bite Attack
- While on the ground, the Hirabami will twist and coil its body. Once the head appears at the top, it will open its mouth and pause briefly. Then, it will lunge forward to bite a target in front of it.
Foreleg Swing
- While hovering, the Hirabami will inflate its neck, then pull back its entire body as it rises to stand up on its hind legs. After pausing briefly, it will use one of its forelegs to swing at a target in front of it.
Grounded Slam
- While the Hirabami is on the ground, it will curl up its body in an S-shape, then launch itself to the side (either left or right). This attack can blow away multiple hunters when hit directly.
Sting Dive Combo
- While on the ground, the Hirabami will pull back its head, and position itself like a cobra. As it opens its mouth, it will lunge forward to bite a target. This attack is often followed up by a movement where the Hirabami will coil its body around the target.
Tail Slam
- If the Hirabami is facing a hunter while hovering, it will quickly turn away and can be heard growling softly as the tail claws are rapidly moving. After this, it will pull back its tail, slam it onto the ground, and then swing it sideways. The Hirabami will pause briefly on-air after this move.
Tail Whip -
While the Hirabami is airborne, it will shift its tail from its right to left, pull it back, then whip it at the target in front of it. It can repeat this move up to 2 times consecutively.
Weapons
- Windbrace Bow I
- Windthrash Charger I
- Windpierce Lance I
- Windshear Light I
- Windclaw Blade I
- Windsunder Axe I
- Frozen Speartuna I
- Windbrace Bow II
- Windthrash Charger II
- Windpierce Lance II
- Windshear Light II
- Windclaw Blade II
- Windsunder Axe II
- Frozen Speartuna II
- Queen Blaster II
- Quematrice Arco IV
- Veldian Arcum I
- Windbrace Bow III
- Dear Lutemis II
- Veldian Labrys I
- Windthrash Charger III
- Quematrice Silexes IV
- Veldian Harpes I
- Quematrice Espada IV
- Valkyrie Blade II
- Veldian Gladius I
- Balahara Exploder IV
- Princess Panoply II
- Quematrice Culebrina IV
- Veldian Hasta I
- Balahara Hammer IV
- Veldian Malleus I
- Queen's Longfire II
- Veldian Tormentum I
- Balahara Horn IV
- Valkyrie Chordmaker II
- Veldian Sibilus I
- Balahara Glaive IV
- Princess Regalia II
- Veldian Trudis I
- Balahara Lance IV
- Quematrice Lanza IV
- Veldian Lancea I
- Windpierce Lance III
- Valkyrie Fire II
- Veldian Impetum I
- Windshear Light III
- Quematrice Lima IV
- Veldian Ensis I
- Windclaw Blade III
- Wyvern Blade Verde II
- Dragonmaiden Axe II
- Veldian Securis I
- Windsunder Axe III
- Balahara Blade IV
- Princess Rapier II
- Quematrice Cuchillo IV
- Veldian Mucro I
- True Dragon Perforator
- Windbrace Ibami
- Regas Hyper
- Rompo Dendrotox
- Windthrash Tamebami
- Dual Cleavers
- Gravios Conquerors
- Ravager Blade
- Triumvirate Edge
- White Cannon
- Graviton Hammer
- Iron Devil
- Rompo Robustox
- Gravios Gigahowl
- Rompo Latrotox
- Steel Assault
- Great Bagpipe
- Chrome Gale
- Gravordius
- Chrome Lance
- Gravios Lance
- Rompo Tetrotox
- Windpierce Tsukibami
- High Chain Blitz
- Titan Panzer
- Windshear Uchibami
- Keen Edge
- Rompo Mytoxin
- Windclaw Kiribami
- Chrome Accelerator
- Windsunder Sakibami
- Smithy's Pride
- Titan's Armament
Armors
- Hirabami Set
- Hirabami Alpha Set
- Hirabami Beta Set
- Blango Alpha Set
- Blango Beta Set
- Gravios Alpha Set
- Gravios Beta Set
- Guardian Fulgur Alpha Set
- Guardian Fulgur Beta Set
- Dahaad Alpha Set
- Dahaad Beta Set
- Damascus Alpha Set
- Gore Alpha Set
- Gore Beta Set
- Arkveld Alpha Set
- Arkveld Beta Set
- Dragonking Alpha Set
Ailments
- Frostblight
Elements
- Ice
Habitats
- Iceshard Cliffs
- Ruins of Wyveria
Weaknesses
- Fire
- Thunder
Gallery